
 Lacto-Fermenation is one of the oldest food preservation methods still regularly used. It is not Witchcraft or Sorcery and it's effective tasty and pretty much bullet proof. If it tastes good, then it's good. Plus the resultant pickles have the benefit of home made probiotics. Lacto-Fermentation has nothing to do with dairy products, the lacto refers to lactic acid. All fruits and vegetables have beneficial bacteria such as Lactobacillus on the surface. In an anaerobic (oxygen-free) environment, these bacteria convert sugars into lactic acid, which inhibits harmful bacteria and acts as a preservative. It's also what gives fermented foods their characteristic sour flavour. The earliest record of fermentation dates back as far as 6000 B.C. in the Fertile Crescent -and nearly every civilization since has included at least one fermented food in its culinary heritage. From Korean kimchi and Indian chutneys to the ubiquitous sauerkraut.
This recipe uses immature marrow as it's been quite a year for marrow in the Yorkshire area, but the season is coming to an end and you might find yourself with quite a number of small marrows which either are unlikely to ripen, or you've simply had you fill of their fully grow kin! But be adventurous, almost any vegetable can be Lacto-Fermented.
Ingredients:-
8 small Marrows thinly sliced into rounds
¼ of a medium sized red onion thinly sliced
3 garlic gloves smashed
2 teaspoons of grated ginger
About a pint of water
3 tablespoons of Sea Salt. Table salt will do but the anti-caking agents will result in a cloudy solution before the process is completed.
½ teaspoon ground turmeric
Large airtight jar
Method:-
(1) Thinly slice the Marrow into rounds (Use a mandolin to get a nice even slice, but don't slice the ends off your fingers! Or in my case the palm of your hand – Don't ask...).
(2) Add the Marrow rounds to a large jar or split between smaller jars.
(3) Add the red onion, garlic and ginger.
(4) Make the salt water brine by mixing ½ cup of warm water with the salt and stir until the salt has dissolved.
(5) Add the remaining water to the salt water once the salt has dissolved. Add the turmeric and mix well.
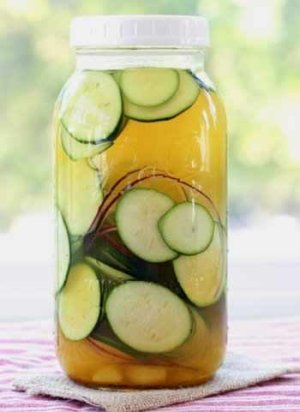
(6) Pour the brine into the jar with the Marrow etc. There should be enough to submerge the Marrow under the brine. If not, make more brine and add it to the jar.
(7) Seal the jar and store in a cool, dry place away from direct sunlight for 3-7 days.
(8) Once the brine is cloudy, try a Marrow to see if it's ready. It should be sour and smell like pickles.
(9) Provided that the contents are submerged your pickle will last for months. Although this is unlikely unless your really don't like pickles. If this is the case you might ask yourself why you made them in the first place!

