Search
Random Recipe
Breakfast Burger

There might be quite a few posts involving Bacon over the next few days. We made quite a bit of home cured Bacon! This is the third cure and we’ve refined it a little. The original recipe is here - http://www.eatwellonuc.org.uk/index.php/recipes/599-dry-cured-bacon Which is pretty robust. This version was for a discounted bone in Loin which weighed just over 2Kg when I’d removed the bone and outer rind.
Rub ingredients:-
50g of Salt
30g of Sugar
3G of Saltpetre
4 Tsp of Smoked Paprika
1 Tsp of Garlic Powder
3 Tsp of fresh ground Black Pepper.
Method:-
(1) Trim the Pork Loin to as near to 2Kg as possible.
(2) Mix the rub ingredients in a bowl.
(3) Apply the rub evenly over the entire surface.
(4) Place in a tub in the fridge loosely covered.
(5) Turn daily for 3 weeks.
The Burgers were hand pressed from a yellow sticker pack of mince at £1.24
So the build went something like – Toasted (Gluten free) Bun base, Mayonnaise, Tomato Sauce, Lettuce, Red Onions, Tomato, Burger, Bacon, Mushrooms, Egg and the toasted Bun top.
As the name implies, we’re still eating this, this morning. Our Christmas roast might be late evening today!
On Facebook
- Details
- Written by Tony Carson
- Category: Recipes
 We had ½ a cooked Chicken left. So Chicken Curry it was! Sue served ours with home-made Green Tomato and Apple Chutney and Coriander & Garlic Flatbreads (Recipes attached)

- Details
- Written by Tony Carson
- Category: Recipes
 This is the Gluten Free recipe but feel free to us plain white flour if you prefer. Idea to serve with a curry as a home made Naan alternative.
- Details
- Written by Tony Carson
- Category: Recipes
 Strangely we found a pile of rather elderly eggs in the wood which had been dumped. Never look a gift horse in the mouth.
- Details
- Written by Tony Carson
- Category: Recipes
 Why Cane Toad? Well they are pretty big and so is this monster! You can buy a Yorkshire pudding mix from most supermarkets for less than 50p and all you need to do is add a couple of eggs and water. Just make sure your oil is smoking hot! Sue's Gluten Free batter mix is below.
- Details
- Written by Tony Carson
- Category: Recipes
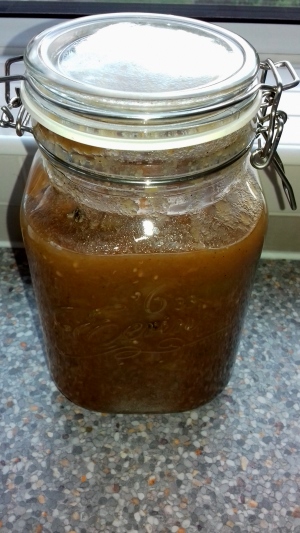 There were quite a number of green tomatoes in the community garden which were not likely to riped and we found some wind-fall apples. This green tomato and apple chutney is the perfect combination of sweet and savoury and works well with a curry.
Social Links
Translate
Latest Recipes
Latest News
- Why do we do what we do?
- When you find the ships cat on the helm
- We're a month old!
- Universal Credit & Employment Agencies!
- UN Report on Poverty in the UK November 2018
- The Veg Box
- The rollout of Universal Credit will be delayed until 2023
- Petition the Government to fix Universal Credit
- Honesty from a Politician? Not really, but it's a start.
- Homeless - Trapped - Homeless again - This can't be right?
© 2026 Eat Well on UC