Search
Random Recipe
Thai Ginger Sea Bass with Dried Mushrooms
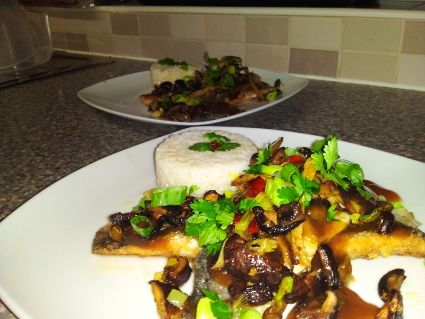
Again the Sea Bass was given to us by a very generous friend (Who doesn’t wish to be named) and would certainly be out of our budget normally. Especially as it came from Booths originally, who make Waitrose look cheep! But apart from the Spring Onions and Coriander we had everything else in – So this is what Sue created……
Ingredients:-
15g of Chinese Dried Mushrooms
40g Cornflour
1 Tbsp of Thai Fish Sauce
2 Tbsp of Soy Sauce
3 Tbsp of Brown Sugar
2 Tbsp of Lime Juice
2 Tbst of drained Capers
2 Garlic Cloves, thinly sliced
1 Red Chilli, finely chopped
6 Spring Onions, finely chopped
Coriander leaves to garnish
5 Cm piece of fresh Ginger, cut into matchsticks
4 Seas Bass Fillets
Oil to fry
Rice as a side, with a couple of Egg yokes
Salt & Pepper to season the raw fish
Method:-
(1) Soak the Mushrooms in hot water for 20 minutes.
(2) Drain and slice thinly. Reserve the water.
(3) Add 3 tbsp of the Mushroom water to 1 tbsp of Cornflour and mix well.
(4) Pour the remaining Mushroom water into a pan and add the Fish Sauce, Soy Sauce, Sugar, Lime Juice, Capers.
(5) Bring to the boil and then reduce the heat to a simmer.
(6) Add the Cornflour mixture and stir in.
(7) Simmer and stir for a minute until the sauce is smooth.
(8) Add the Oil to a large frying pan and heat to 190c.
(9) Season the Sea Bass on both sides and then coat in the remaining Cornflour.
(10) Plain the Sea Bass skin side down in the frying pan and fry for one minute.
(11) Turn over and fry for another minute.
(12) Place in a warm oven.
(13) Heat oil in a fresh frying pan and fry the Garlic, Chilli and Ginger over a low heat for a minute.
(14) Add the sliced Mushrooms and half of the chopped Spring Onions.
(15) Place the Sea Bass on a warmed plate, spoon over the sauce, add the fried mushroom mix over the Fish and garnish with the remaining Spring Onions and a little Coriander.
We served ours with Egg Fried formed from an upturned ramekin, because if you’re going to do pretentious, you might as well do it right! This meal actually cost us next to nothing, took longer to type than cook and was one of the best meals we’ve had recently…...
On Facebook
- Details
- Written by Tony Carson
- Category: Recipes
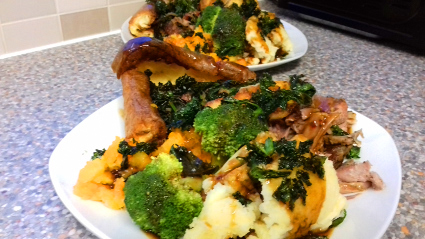
We’re moving steadily forward with our Ingredients Alphabet gig. K? Well it’s Kale season, it would have been rude not to….
Kale with Onion and Bacon
Ingredients:-
Kale (Obviously!)
1 medium Onion sliced
3 rashers of streaky Bacon, chopped
Salt & Pepper
1 clove of Garlic, crushed
Oil to fry
Method:-
(1) Blanch the Kale for a couple of minutes.
(2) Add the Onion and Garlic to a frying pan and fry until the Onion is translucent.
(3) Add the Bacon and fry for a couple of minutes.
(4) Season with Salt and Pepper.
(5) Add the blanched Kale and stir well for a couple of minutes.
Crispy Kale
Ingredients:-
Kale, chopped
Method:-
(1) Blanch the Kale for a couple of minutes.
(2) Drain well.
(3) Pre-heat oil to 180C in a deep fat fryer or similar.
(4) Fry the Kale until crispy and drain well on kitchen paper.
Kale might be a bit of a primitive Brassica, but it has so much more flavour than the generic white Cabbage alternative.


- Details
- Written by Tony Carson
- Category: Recipes

There’s a Polish Deli just around the corner. We love Garlic. But I might have over done it with the 5 bulbs I bought last week. So what is the traditional / historic way to deal with an excess of Garlic?
Ingredients:-
Garlic cloves, cut in half - lots of!
2 table spoons of salt
2 table spoons of sugar
Dill Seeds, whole (They have the Lactobacillus bacteria you need)
Black Pepper Corns (They also the have Lactobacillus bacteria you need)
Water
Method:-
(1) Add the Salt and Sugar to the water. It will dissolve over time. Don’t heat it as you will kill the bacteria.
(2) Cover the Garlic cloves, Dill seeds and Pepper Corns in the brine.
(3) Pour into a sealable jar and pop the lid on.
(4) Vent every day, more often as the fermentation peaks. (You will fill the house with the smell of Garlic!)
(5) After a month or so the fermentation will die off. Good to eat. But only use ½ the amount which you would have with fresh Garlic!!!!
- Details
- Written by Tony Carson
- Category: Recipes
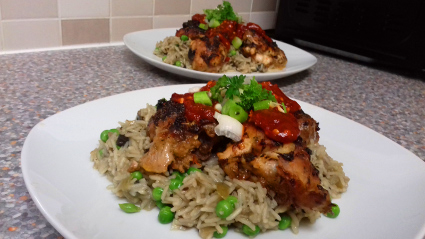
I carted a discount isle Chicken back from Darlington with me the other day. It wasn’t actually any cheaper than the local discount isle Chickens – But it was exotic in it’s own way, in my strange mind!
We’re also at “J” in our Ingredients Alphabet and Jerk Chicken fits nicely!
Ingredients:-
Chicken, roughly cut into joints / portions
Spring Onions, chopped
Ginger, a thumb sized bit grated
2 cloves of Garlic, grated
1 medium Onion, sliced
3 small hot hot Chillies, sliced
Chilli flakes
Thyme
Juice of a Lemon
Soy Sauce
Oil
Sugar
All Spice
Salt & Pepper
Method:-
(1) In a blender blitz all the ingredients – Not the Chicken!
(2) Marinade the Chicken portions for 30 minutes or more.
(3) Roast at 180C for 40 minutes or into tender.
We served ours on a bed of Rice and Peas with a hot Chilli sauce on the top and the greens from the Spring Onions.
- Details
- Written by Tony Carson
- Category: Recipes
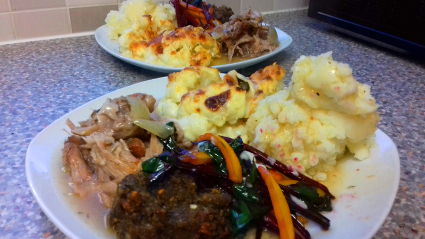
Discount fridge Pork shoulder can be tough as old boots if you try to cook it too quickly. This certainly wasn't!
Ingredients:-
1 large Onion, quartered
2 cloves of Garlic, minced
Salt & Pepper
Mixed Spice
Rosemary
Chilli flakes
500ml of Stock
½ pint of Cider
2 tbsp Cider Vinegar
Method:-
(1) Lay the Onions in the bottom of the slow cooker.
(2) Place the Pork shoulder on to of the Onions.
(3) Season with the herbs and spices.
(4) Mix the remaining ingredients with the stock and pour around the meat.
(5) Cook in a slow cooker on high, or in a casserole at 120C for about 6 hours. The Pork should be tender enough to pull apart.
We served ours with mashed Potato, Cauliflower Cheese, Indian style Stuffing balls and sautéed Beetroot top with peppers – for a little colour. This Shoulder recipe is really good!
- Details
- Written by Tony Carson
- Category: Recipes

This is going to sound very odd. But experiments sometimes work!
I found some Shaggy Ink Caps in the communal area near the flat. Although they are really good eating they degrade quickly and really don’t store well. So they need eating the day you pick them realistically. We also had an opened pack of Bombay Mix which had gone a bit soggy. Not a great ingredients list so far?!
Ingredients:-
Soggy Bombay Mix!
4 large Shaggy Ink Caps
Water - If required
Method:-
(1) In a food processor blitz the Bombay mix.
(2) Add the Ink Caps and blitz everything. The mushrooms contain a good deal of water so you will end up with something which is reasonably wet.
(3) If needed add a little more water to make the dough manageable.
(4) Form into balls and pop in the oven for the last 20 minutes with your roast.
There is an old wives tale that you shouldn’t eat Shaggy Ink Caps and drink Alcohol. It is just that – An old wives tale. They are a very good “Beginners Mushroom” for foraging as there is nothing similar looking which will do you any harm.
Social Links
Translate

Latest Recipes
Latest News
- Why do we do what we do?
- When you find the ships cat on the helm
- We're a month old!
- Universal Credit & Employment Agencies!
- UN Report on Poverty in the UK November 2018
- The Veg Box
- The rollout of Universal Credit will be delayed until 2023
- Petition the Government to fix Universal Credit
- Honesty from a Politician? Not really, but it's a start.
- Homeless - Trapped - Homeless again - This can't be right?
© 2026 Eat Well on UC